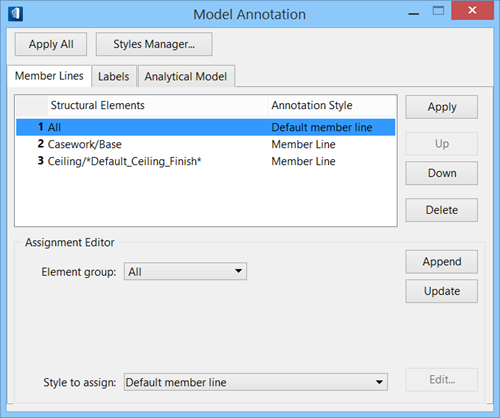
| Assigned Annotations Display List and Controls |
- Display list columns — Used to manipulate Structural elements and the annotation styles applied to them during drawing annotation.
- Structural Elements – Displays the element types that are affected by the saved annotation style, as selected in the Element Group drop-down of the Assignment Editor section. The order determines how the member lines or labels will appear on screen — an element or line that is included in a group (steel beams, for example) will be affected by the first group that includes it, but no more. If, for example, you have as #1 All with No Labels in the Annotation Style, and as #2 Steel/Beams with Part/Family in the Annotation Style, then no labels will appear. This is because all elements, including steel beams, are in the group All.
- Annotation Style – Displays the name of the annotation style that was selected in the Style to Assign drop-down of the Assignment Editor section.
- Controls — Control buttons are used to apply, rank or remove selected styles.
- Apply – Applies the styles listed in the currently active tab (Member Lines or Labels). Even if you made no changes, the listed styles are reapplied.
- Up – Moves the highlighted annotation style up a level in rank. The rank is important, because a label or member line is affected only by the first annotation style that includes it. If you have created many styles and yet All is first in rank, then none of your custom styles will be applied. All member lines or labels are included in the All group, and therefore will take on the annotation of the All group.
- Down – Moves the highlighted annotation style down a level in rank. The rank is important, because a label or member line is affected only by the first annotation style that includes it. If you have created many styles and yet All is first in rank, then none of your custom styles will be applied. All member lines or labels are included in the All group, and therefore will take on the annotation of the All group.
- Delete – Deletes the highlighted annotation style selection. Any annotation styles below it move up in rank.
|
| Assignment Editor |
- Element Group – All — Selects all elements. Remember that if you have any element group of All in your list, it overrides any changes you may have made below it in the list. There are no additional settings for this assignment element selection. The dialog user interface updates accordingly.
- Element Group – Part and family — These settings designate a particular family and part to have the selected annotation style applied. You must also complete the both family and part fields. Family and Part option menus are enabled where you can specify a family name and/or part name. The dialog user interface updates accordingly.
- Family – Select the part family from this list box.
- Part – Select the part from this list box.
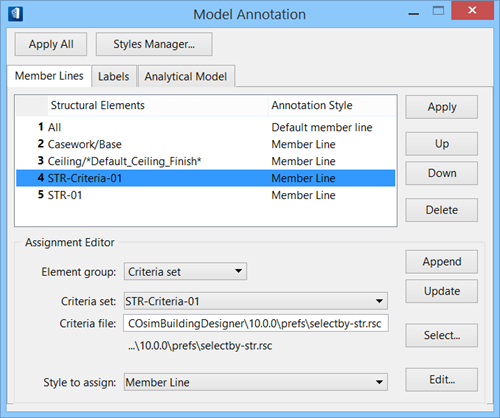
- Element Group – Criteria set — Enables the Criteria set option menu where you can specify a saved criteria set name. The dialog user interface updates accordingly.
- Criteria set – Select the criteria set from this list box.
- Criteria file – Select the criteria family from this list box.
- Element Group – Grouped criteria — Enables the Grouped criteria option menu where you can specify a saved group criteria set.
- Grouped criteria – Select the grouped criteria from this list box.
- Criteria file – Select the criteria family from this list box.
- Element Group – Single/selection set — Lets you select in the workprint the elements of the selection set. Enables the Element IDs list box and the Add, Remove, and Flash buttons. These buttons are described below.
- Element ID's – Lets you identify individual members and automates their Element ID's addition to the list.
- Add... – Identify the element whose element ID you want to add to the selection set, then click Add to add it to the list.
- Remove – Select the element from the selection set, then click Remove to remove it from the selection set.
- Flash – Flashes all elements with the highlighted element ID in the DGN file so you can visually identify them in the view.
- Assignment Editor control buttons
- Append – Adds the selected Element group to the list of items to be annotated.
- Update – Updates the selected Element group and incorporates changes you made.
- Select – Opens the Select Criteria Resource File dialog. This button is activated when the element group is set to criteria sets or criteria groups.
- Styles list box
- Styles to assign – Lists and lets you choose from the existing saved annotation styles.
- Edit... – Opens the Edit Model Annotation Style dialog for the annotation style selection set that is listed in the Assignment Editor section so you can make changes.
|